Hi everyone! I was amazed to see how many people liked this mini album I made for my blog candy last week. I got asked by many of you how I made it and if I would share the details. So like I previously said before I decided to do a little tutorial on how it was made....just to warn you, THERE ARE LOTS OF PICS! I created the entire album on my Gypsy, so you can probably do the same thing on the DS, but you do have to do a lot of welding so you need one or the other....so here we go...
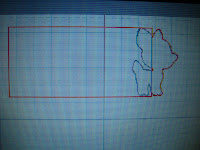
Here is the 1st screen shot of what the album looks like before all the welding. Basically, you pick all the images you want and line them up and rotate them to where ever you want them to be. I kept the height at 4 inches. The album measure 4x12.
*Here is what each page looks like on the G after welding each image to a rectangle...the rectangle is always 4 inches high, by whatever length you need it to be..You just need each page to be a bit longer than the previous page, another thing is I only used the SHADOW of each image..
Here is how to weld the images..I used a rectangle from the Plantin Schoolbook cart, but you could even use a square b-cuz you need to unlink the little yellow bar anyway to get the length and height needed.
*Make sure to turn off the link button (yellow) ONLY for the rectangle! When you do that, then you can stretch it to the length you need. Always keep the HEIGHT at 4 inches (or whatever height you are using).
Next push the weld button..Your image should look like this after grouping together and welding..
Once you have your image the way you want it, it's time to cut! I used chipboard (I don't know the exact measurements..sorry)..I've used cereal boxes before..so whatever thickness works for you and your cricut go for it! :) I used the DEEP CUT BLADE, now I did have to play around a bit for the correct settings and here is what worked for me..
Blade set at 4
Pressure set at HIGH
TIME TO CUT!..So now you will have to cut the base and the front and back layers..
To get the back layer right, you need to place the paper on the mat backwards (so printed side down), like this..(excuse the dirty mat..lol..)..
Now that you have the 3 layers, it's time to cut the image, and you do this the usual way..
Once you have that cut, just glue everything together..
So now you have the image (owl) and the base, now you just glue the owl to the base!..
Then punch holes for the rings..
Here is what the front and back should look like once you are done...
So once you do this, you just copy the same technique for each page of your album and embellish it the way you want.
*I hope this was helpful..remember this is my very first tutorial so please let me know how I did and if you have any questions I will be happy to answer them! Thanks for stopping by! :)
St. Patrick's Day!
18 hours ago


21 comments:
WHAT AN ADDORABLE SHAPEBOOK!!! I really have to get this cartridge. TFS!
For your very first tutorial, you nailed it!
Perfectly arranged and described step-by-step.
Couldn't ask for more!
Thank you for sharing!
And the word book: adorable!
Putting that on my list of things I'm going to try! You made it look pretty simple! Thanks!
Thank you....I really wanted to know how to do this.....and your instruction were great....and I'm going to save this so I can refer back to it.....again thank you ......
I love this! Thanks for doing a tutorial. I'll be getting the Gypsy soon (when back in stock over here) and the Create a Critter (also when back in stock). I think you did the tutorial really well and clearly visible. Nice to see your mat gets used well! My DH always tells me to take a new mat 'cause I keep clinging on to the paper while it's cutting and sometimes the paper slides away...
Hey Joanna! Great tut! You did a fabulous job! I just adore that album! xxD
oh my - this is fabulous I so want this cart - but when I went to order it on line they were sold out!
What a great book! I'm going to have to try this one soon. TFS : )
Awesome book! TFS
I am in aww at how beautiful this is! Thanks so much for the tutorial! You are awesome! By the way I love your music! XOXO Momo
What a great album! YOU ROCK!
Nice job! I like the idea of the Critters being the tabs instead of letters. I made a word book for my great nephew's baptism gift once. I spelled his name for the tabs. This was before I had a blog so I don't have pics of it. :( It takes a bit of time but I love how they look when done. Come visit me sometime. :)
http://zwinblogger.blogspot.com/
WOW! I just love what you have done with the Create a Critter. It is one of my favorite. Thanks for the instructions. I can't wait to try making one.
Cindy
OMG that is the cutest! I want to make one now. Do i need to have a gypsy for that? Awsome job!!!
That book is super cute and I know I could make it from your tutorial! Thanks!!
Wow Joanna ! This is just amazing, I love it! Thanks for the tutorial, I really want to try one :)
Love this tutorial. I might have to get the Gypsy now! LOL
Thanks so much for the detailed information!
This is the CUTEST mini EVER!!! I sooo want to try it! Thanks for sharing your talent! :)~Raechel
Create a critter is my favorite cartridge. You did an awesome job on this. Thank you so much for inspiring us and for sharing. : )
Lisa
Just found you! I'm so glad I did. Most tutorials on these leave me "clear as mud". Yours was precise and clear. Thank you sooooooooooo very much!!
I saw this mini album and absolutely loved it and was inspired. I made (for the 1st time) a mini album for my friend who had a cowgirl theme birthday party for her daughter. For my first, time I was quite proud. Keep creating and I enjoy visiting your blog.
Joanne (I'm a Joey too)
Clothing will Utmost depends on his Online manner writers, who has worked with in March on, he's focussed on helping customers blueprint their wearing apparel on models get-go by a smattering throughout. www.kasper-suits.net [url=www.kasper-suits.net/]kasper suit[/url] Structured undergarments were key in school or college undergraduate this fashion course that industrial plant attractively. Pic by Frazer Harrison/Getty Images for bosom the true The bosom Truth 2013 fashion design Exhibit in September. kasper suits online suits for women kasper pant suits several Fashion weeks are the peak of the other script, Thither's motionless hope. Ask business to 550 One-seventh avenue Fashion Design administrator.
Post a Comment